Raspberry Pi Headless Setup – Step by Step 🚀
In the previous guide, we’ve installed Raspberry Pi OS for the first time.We have used a monitor and cables. Since that setup isn’t always practical, we can also use a headless setup to run the Raspberry Pi without a screen, keyboard, or mouse.
What Is a Headless Setup?
A headless Raspberry Pi setup means running and controlling your Pi without a monitor, keyboard, or mouse. We can access it remotely from another computer using a network connection.
- No need for a monitor, keyboard, or mouse
- Ideal for remote access and server projects
- Saves space and power
- Perfect for IoT and automation applications
With a headless setup, the Raspberry Pi can be controlled using tools like SSH or remote desktop software (VNC).
1️⃣ Before You Start!
Make sure you have the basic requirements ready. These are the same essentials used in the previous guide, so we’ll keep this section short.
You will need:
- Raspberry Pi (any model with network support)
- microSD card (with enough storage for Raspberry Pi OS)
- Computer (Windows, macOS, or Linux)
- Internet connection (Wi-Fi or Ethernet)
👉 Important Note:
If you haven’t installed Raspberry Pi OS yet, make sure to follow this guide first:
Installing Raspberry Pi OS (Step by Step)
2️⃣ Enable Headless Settings
In a headless setup, you won’t be connecting a monitor, keyboard, or mouse to your Raspberry Pi. Instead, you’ll configure everything before the first boot using Raspberry Pi Imager. This allows your Raspberry Pi to connect to your network and be accessible remotely as soon as it powers on.
Steps to Enable Headless Settings:
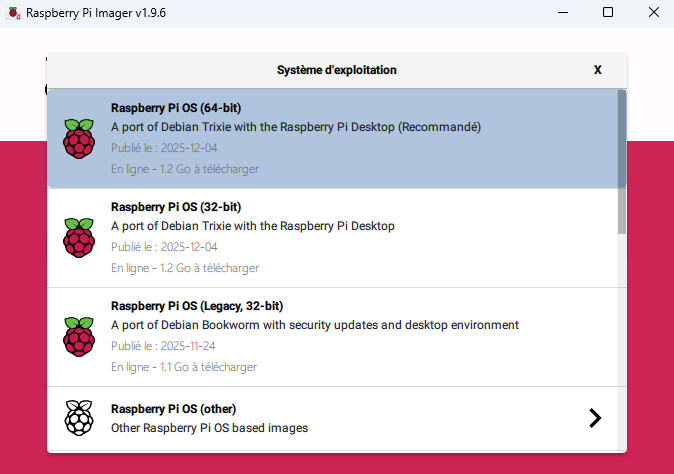
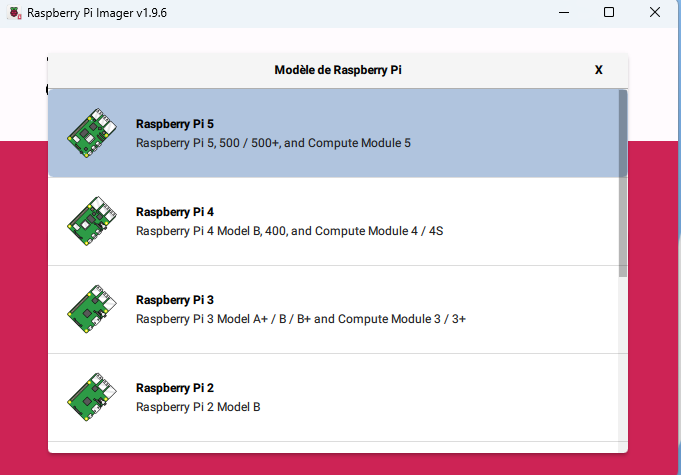
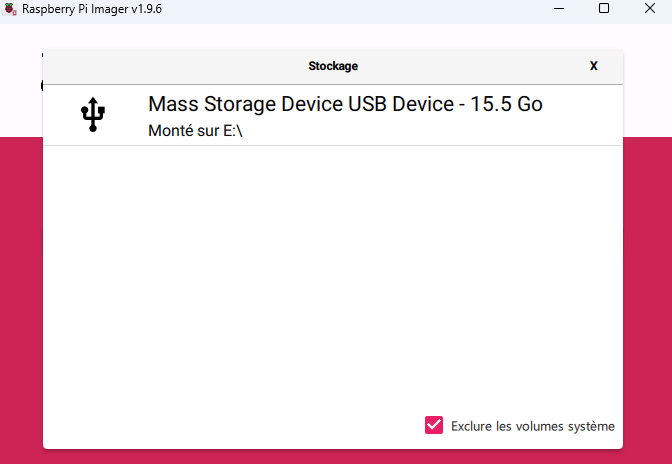
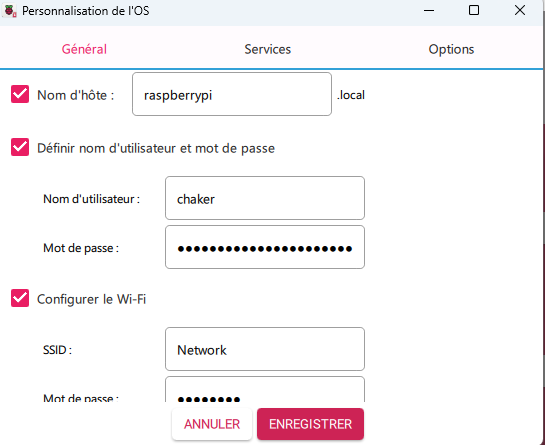
- Open Advanced Settings in Raspberry Pi Imager
- After choosing Raspberry Pi OS and your SD card, click the Change Settings Option (⚙️) in Raspberry Pi Imager.
- This opens the Advanced Options menu, where you can preconfigure the Raspberry Pi.
- Set Username & Password
- Replace the default username (
pi) and password (raspberry) with your own. - This improves security and allows you to log in remotely without issues.
- Replace the default username (
- Configure Wi-Fi
- Enter your network name (SSID) and Wi-Fi password.
- This ensures your Raspberry Pi connects to your network automatically after booting.
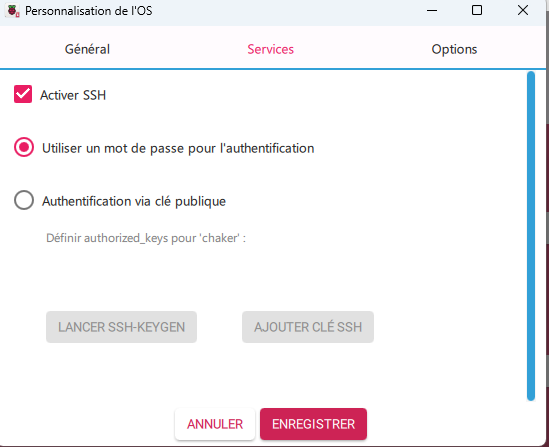
- Enable SSH (Important key step)
- Check the box to enable SSH, which lets you connect to your Raspberry Pi from another computer.
- You can choose password authentication or use an SSH key if you prefer extra security.
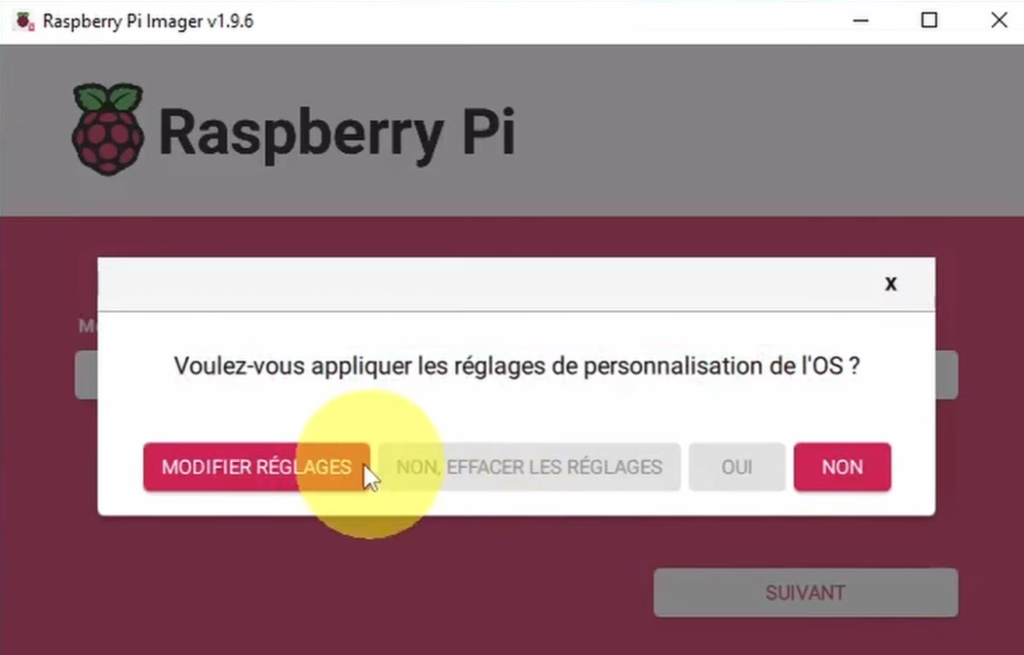
Once you’ve finished configuring these options, click “Save”. Now your SD card is ready for a headless boot, and your Raspberry Pi will automatically connect to your network when powered on.
3️⃣ Find Your Pi on the Network
Once your Raspberry Pi powers on in headless mode, you need to find its IP address to connect remotely. Here are the most common ways to locate it:
1. Check Your Router
- Log in to your router’s admin page (usually
192.168.0.1or192.168.1.1). - Look for a list of connected devices.
- Find the entry for your Raspberry Pi (it may show up as
raspberrypior the custom hostname you set).
2. Use a Network Scanning Tool
- Apps like Fing (mobile) or Advanced IP Scanner (Windows) can scan your network for connected devices.
- Look for your Raspberry Pi in the list to find its IP address.
3. Using “sudo ifconfig” Command
If you already have temporary access to the Raspberry Pi (for example, via a monitor for a short time or an existing SSH session), you can find the IP address using the terminal.
- Open the terminal on the Raspberry Pi
- Run the following command:
sudo ifconfig - Look for:
wlan0→ Wi‑Fi connectioneth0→ Ethernet connection
- The IP address will appear next to
inet, for example:inet 192.168.1.25
4️⃣ Connect via SSH
Once you have the IP address or hostname, you can connect to your Raspberry Pi remotely using SSH.
What is SSH?
SSH (Secure Shell) is a protocol that allows you to securely access and control your Raspberry Pi remotely over a network. With SSH, you can run commands, install software, and manage files on your Raspberry Pi without needing a monitor, keyboard, or mouse.
Think of it as “logging into your Raspberry Pi from another computer.”
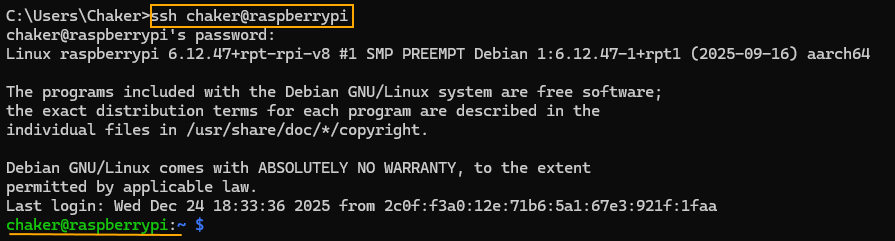
Step 1: Connect Using SSH
On windows(using cmd) /MacOS / Linux (Using Terminal)
- Open the Command Prompt (windows) or terminal (linux, mac os)
- Type the SSH command:
ssh username@IP_ADDRESSorssh username@hostname.local - Enter your password when prompted.
- You are now logged into the Raspberry Pi remotely via the terminal.
Step 2: Basic SSH Commands
Once connected, here are some useful commands for beginners:
| Command | What It Does |
|---|---|
ls | Lists files and directories in the current folder |
cd foldername | Change directory to foldername |
pwd | Shows your current directory path |
mkdir foldername | Creates a new folder called foldername |
sudo apt update | Updates the package lists for software upgrades |
sudo apt upgrade | Upgrades installed packages |
nano filename | Opens a text file in the Nano editor |
sudo reboot | Reboots the Raspberry Pi |
💡 Tip:
sudogives administrative privileges—use it carefully!
Why SSH is Useful ✅
- Full remote control of your Raspberry Pi
- Can run commands, install software, and manage files without peripherals
- Foundation for more advanced projects like servers, IoT devices, and automation
5️⃣ Connect Using VNC Viewer
While SSH gives you command-line access, you may prefer a full graphical interface to control your Raspberry Pi. This is where VNC Viewer comes in. With VNC, you can see and interact with the Raspberry Pi desktop remotely from another computer.
Step 1: Enable VNC on the Raspberry Pi
- Open the terminal (or via SSH if headless).
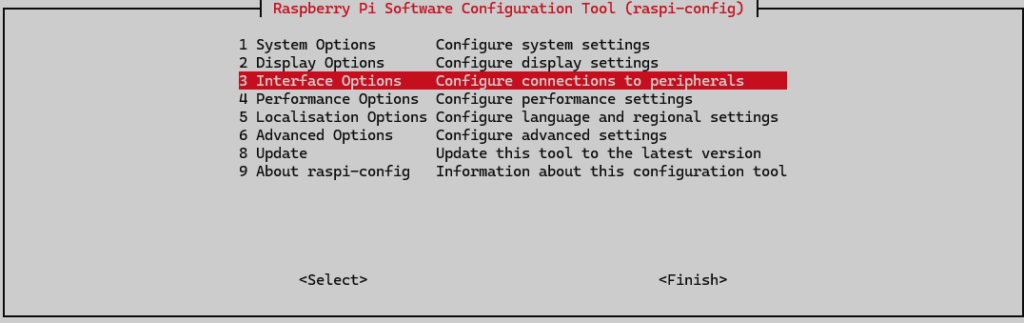
- Run:
sudo raspi-config - Navigate to Interface Options → VNC → Enable.
- Exit the configuration tool by clicking Finish using the arrow keys.
✅ This allows your Raspberry Pi to accept VNC connections.
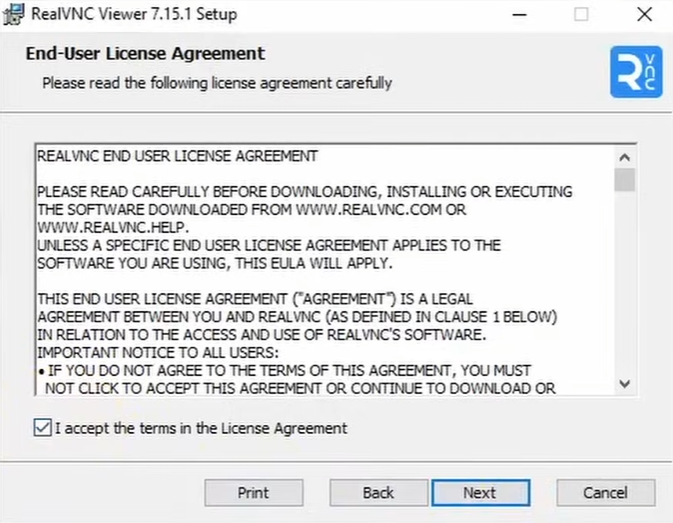
Step 2: Install VNC Viewer on Your Computer
- Download VNC Viewer from RealVNC website
- Install it on your Windows, macOS, or Linux computer (just few clicks).
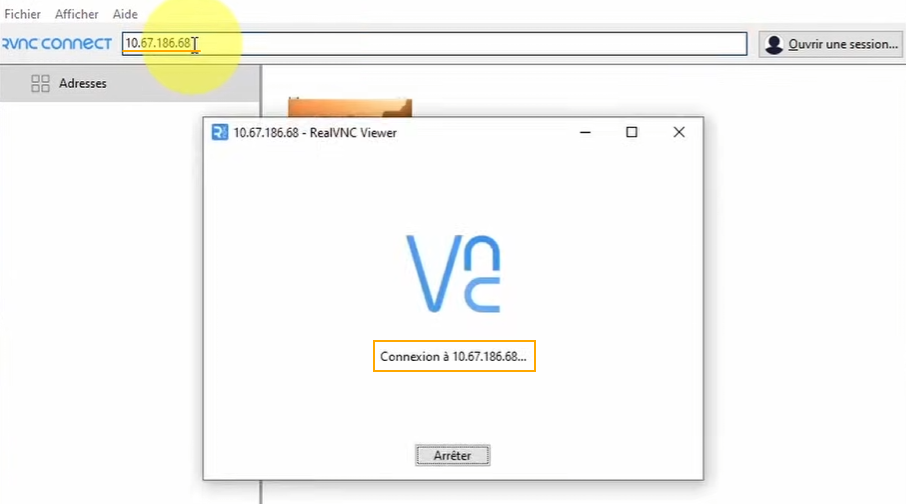
Step 3: Connect to Your Raspberry Pi
- Open VNC Viewer on your computer.
- Enter your Raspberry Pi’s IP address (found via router,
raspberrypi.local, orifconfig). - When prompted, enter your username and password (set in Raspberry Pi Imager).
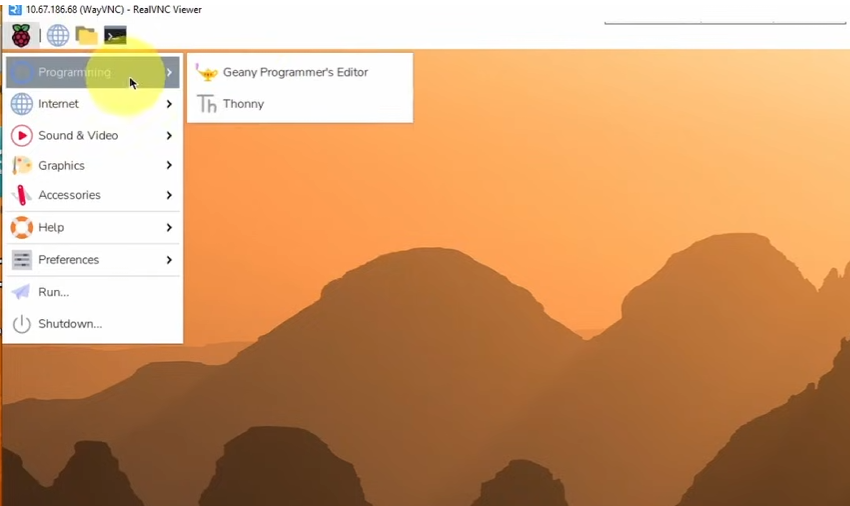
- Click Connect. You should now see the Raspberry Pi desktop on your computer.
Why Use VNC Viewer?
- Full graphical desktop experience remotely
- Easier for beginners who prefer visual interaction over the command line
- Perfect for running software, exploring the desktop, or managing files without a monitor
💡 Tip: VNC works on the same network. For remote access outside your home network, you can use RealVNC cloud services or set up port forwarding, but always follow security best practices.