🚀 Getting Started with Arduino Using mBlock (Beginner-Friendly Guide)
📌 Introduction
If you’re new to electronics and coding, starting with traditional Arduino code can feel intimidating. That’s where mBlock comes in—a visual, drag-and-drop programming platform that makes learning Arduino simple and fun.
In this guide, you’ll learn how to set up mBlock, connect your Arduino board, and create your first project without writing a single line of code.
🧠 What is mBlock? :
mBlock is a graphical programming software based on Scratch 3.0. It allows you to program Arduino using blocks instead of text-based code.
✅ Main Key Features:
- Drag-and-drop coding (perfect for beginners)
- Supports Arduino, ESP32, and more
- Converts blocks into Arduino code
- Built-in tutorials and extensions (libraries)
🔧 What You’ll Need
To follow this guide, you will need the following components:
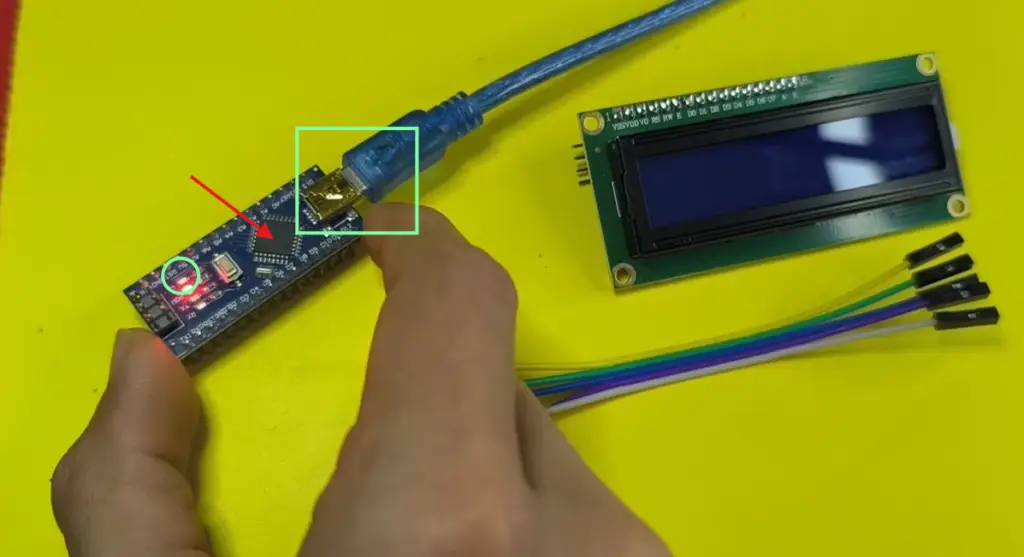
- Arduino Uno (or compatible board)
- LCD Display 16×2 (with I2C adapter – highly recommended to save pins)
- mBlock software
Getting Started: Installation
You have two options to run mBlock: directly in your web browser (online) or as a desktop app. We will focus on the desktop version for reliability.
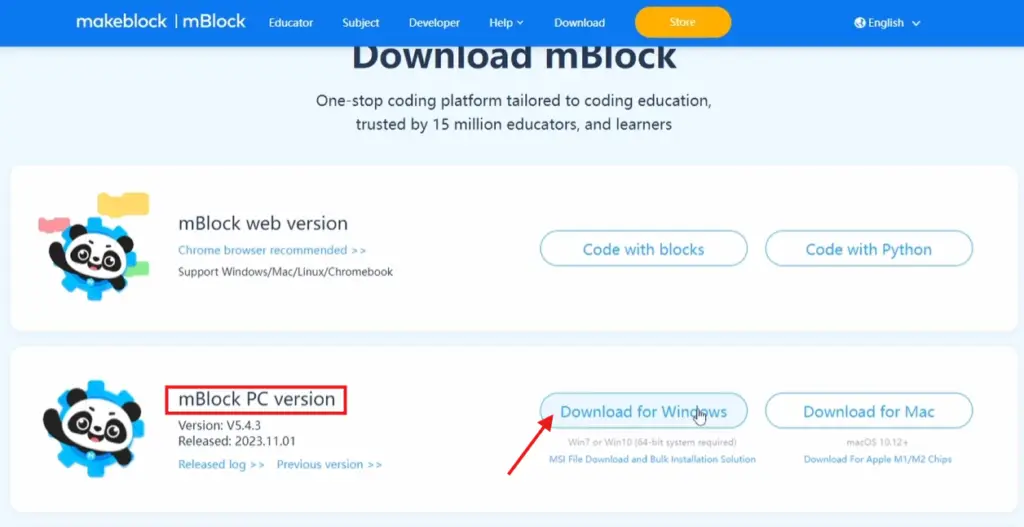
Step 1: Download mBlock
Go to the official mBlock website and download the version for your operating system (Windows, Mac, or Linux).
Step 2: Install the Software
Run the downloaded installer. When the setup gives you the option, allow it to install the Arduino driver. The system might pop up a security warning—this is normal, so allow the installation to proceed.
Step 3: Launch and Configure
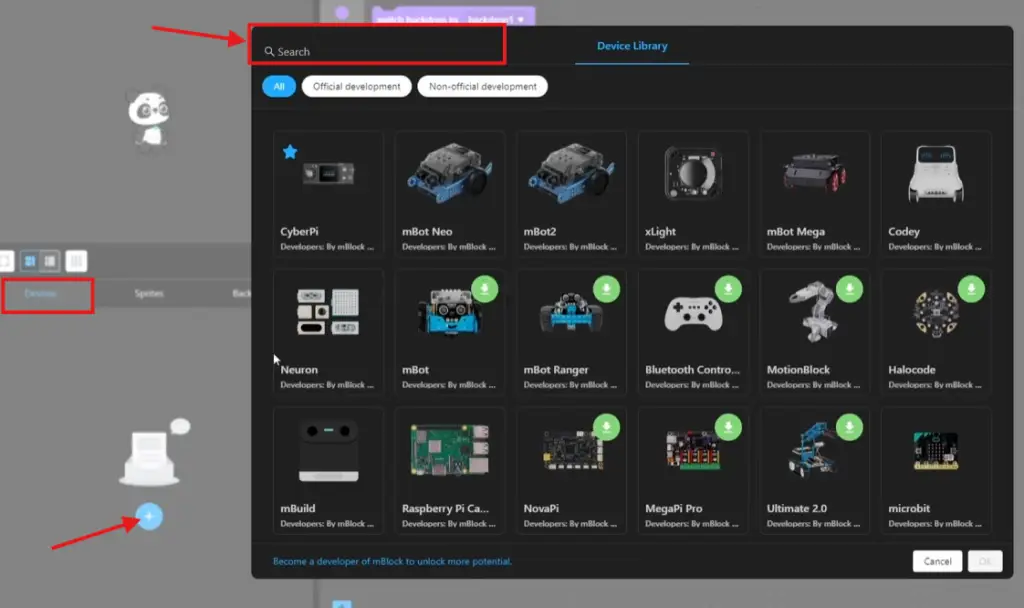
Open mBlock. You will see a colorful interface with a cartoon panda (the “Sprite”) on the stage
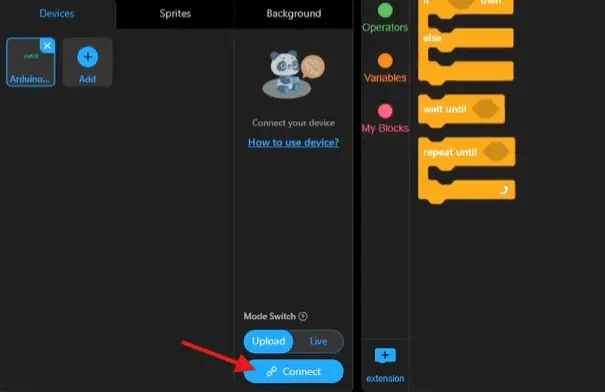
- Click on “Devices” at the bottom left.
- Click “Add” (or the “+” sign).
- From the list, search and select Arduino Uno (even if you have a different model; this is the standard starting point).
Connecting Your Arduino
Now that the software knows what board we are using, we need to connect the physical hardware.
- Connect the Cable: Plug your Arduino into your computer using the USB cable.
- Connect in Software: In mBlock, ensure “Upload mode” is selected. There is usually a toggle switch labeled “Live” or “Upload”. You want Upload mode so the code runs on the board itself, not just the computer.
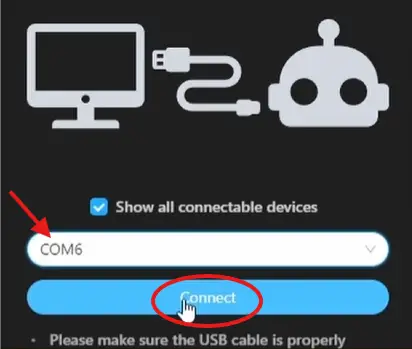
- Select Port: Click the “Connect” button. A list of “COM Ports” (Windows) or “tty/usb” (Mac/Linux) will appear. If you are unsure which one is your Arduino, unplug the board, look at the list, plug it back in, and select the new one that appears.
Your First Project: The “Blink” Test
Every Arduino journey starts with blinking the built-in LED. It is the “Hello World” of hardware.
Follow these steps to build the program:
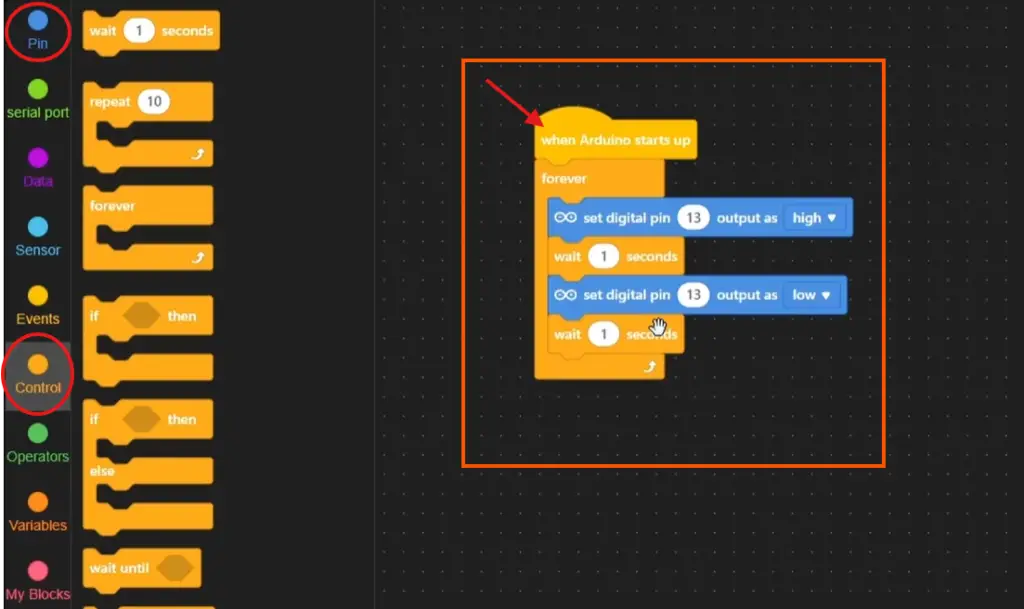
- The Loop: Go to the Control category and drag a
foreverblock onto the scripting area. This acts like Arduino’sloop()function, running repeatedly. - Digital Write: Go to the Pin category. Drag a
set digital pin () output as ()block inside theforeverblock.- Set the PIN to 13 (this is where the built-in LED lives).
- Set the state to HIGH (which means “on”).
- Add a Delay: Go back to Control and drag a
wait () secondsblock. Place it right under the “set pin” block. Set it to1. This keeps the light on for one second. - Turn it Off: Drag another
set digital pin () output as ()block. Keep pin 13, but set the state to LOW. - Add Another Delay: Finally, add another
wait () secondsblock, set to1.
Now, click the “Upload” button (usually near the top right). The software will compile your blocks into code and send it to the board.
In a few seconds, the small yellow/orange LED on the Arduino board should start blinking steadily!
🔄 Switch to Arduino Code (Optional)
mBlock lets you see the generated Arduino code.
Click “Arduino Mode” to view something like:
void setup() {
  pinMode(13, OUTPUT);
}

void loop() {
  digitalWrite(13, HIGH);
  delay(1000);
  digitalWrite(13, LOW);
  delay(1000);
}
This helps you transition from blocks to real coding.
📺 Using an LCD with Arduino in mBlock
An LCD (Liquid Crystal Display) screen lets your board output messages, sensor readings, or menu options.
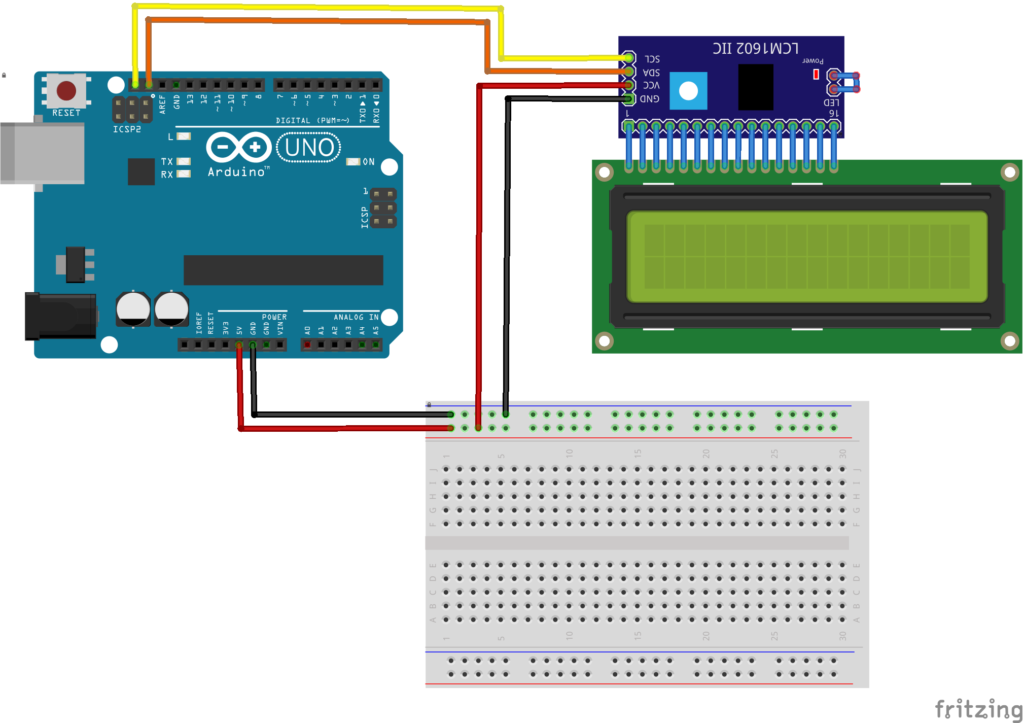
Step 1: Wire It Up (The Easy Way)
Find an LCD screen that has a small I2C backpack. Connect it to your Arduino using jumper wires:
Step 2: Install the LCD Extension
Unlike the basic Pin blocks that appear by default, the LCD requires installing an extension.
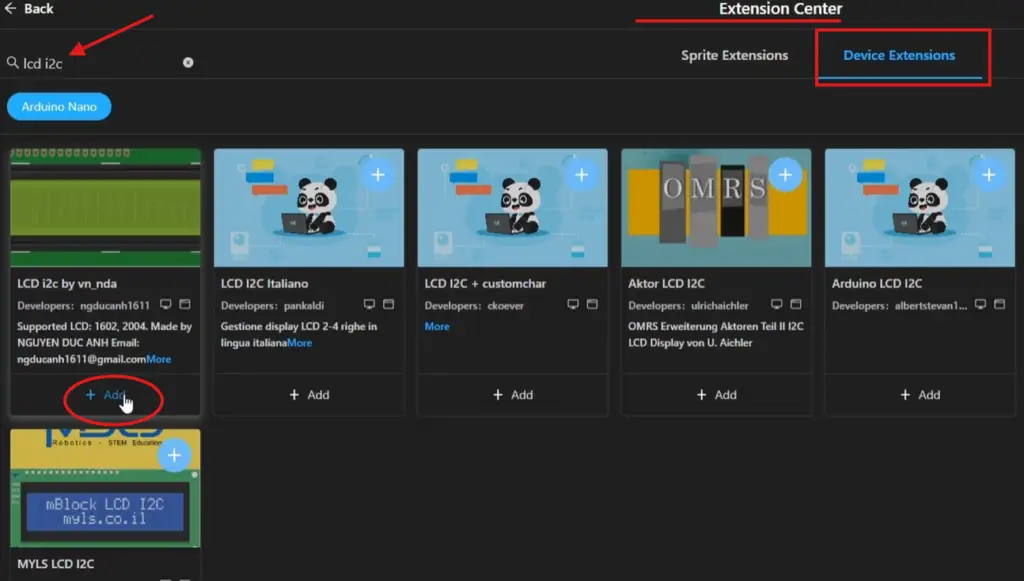
- In mBlock, look for the Extensions icon (a puzzle piece or a “+ extension” sign in the bottom-left corner).
- Click “Extensions Center” or “Manage Extensions”.
- In the search bar, type “I2C LCD” or “LCD 1602”.
- You will see several options. Look for an extension simply called “LCD I2C” or a Makeblock-branded LCD extension. Click “Add”.
- Once added, a new colored category (usually called “Show” or “LCD”) will appear in your blocks palette.
Step 3: Your First “Hello World” on LCD
Once the extension is added, let us write your name on the screen. Since we only want to set up the screen once (not every loop), we use the when Arduino Uno starts up block.
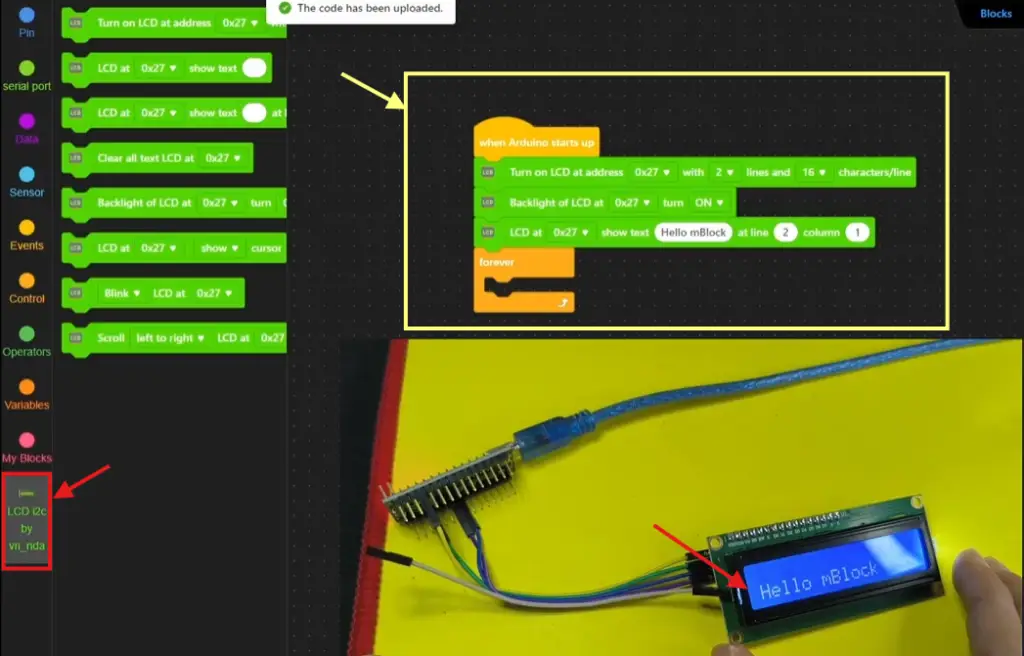
The Code Recipe:
- Events: Drag
when Arduino Uno starts up. - LCD (Initialize): Inside the “LCD” category, drag
turn on LCD. Set the address to 0x27 (or 0x3F), rows to 2, and columns to16(for a 16×2 screen). This block must run once before anything else - LCD (Backlight): Drag
Backlight of LCDto turn on the backlight - LCD (Print): Drag
LCD show text "your text" at line(2) column (1)- Set row 2 (the second line).
- Set column 1 (the first character position).
- Type your name (“Hello mBlock”) in the text field.
- Upload: Click the Upload button.
📈 What’s Next?
Once you’ve mastered the basics, try:
- Controlling LEDs with buttons
- Using sensors (temperature, light, motion)
- Building simple automation projects
- Switching to full Arduino coding
🏁 Conclusion
Moving from blocks to text is a natural progression. mBlock removes the friction of the first few hours of coding, letting you taste the victory of making a physical object react to your commands.
Once you master the blocks, look at the “Code” panel in mBlock to see what the C++ looks like. You will quickly realize you are already learning the syntax without even trying.
Have fun, and happy making!