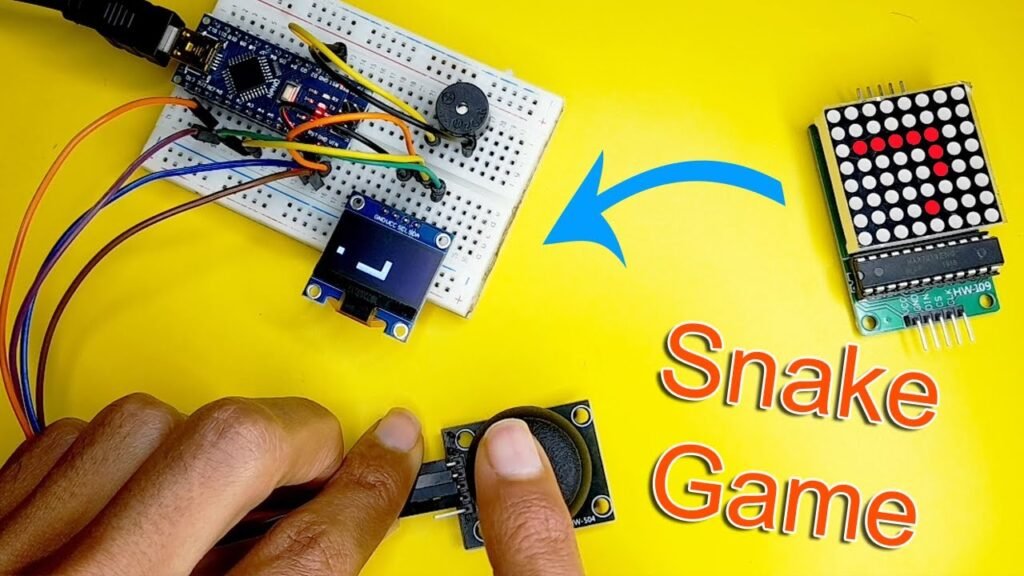
Arduino Snake Game 🐍with Joystick, OLED Display, and Buzzer
The Snake game is one of the most iconic classic games ever created. So let’s create this timeless game using an Arduino, a joystick module, and an OLED display. The joystick controls the snake’s direction while the OLED screen displays the game in real time.
This is a fun beginner-to-intermediate electronics project that teaches you about Arduino graphics, joystick input, and game logic.
📦 Components Required
To build this project, you’ll need the following components:
- Arduino Uno (or compatible board)
- SSD1306 128×64 OLED Display
- Analog Joystick Module
- Active Buzzer Module (Optional)
- Breadboard
- Jumper wires
I highly recommend getting a complete starter kit that includes everything you need to create so many projects, including this snake game.
🔌 Circuit Connections
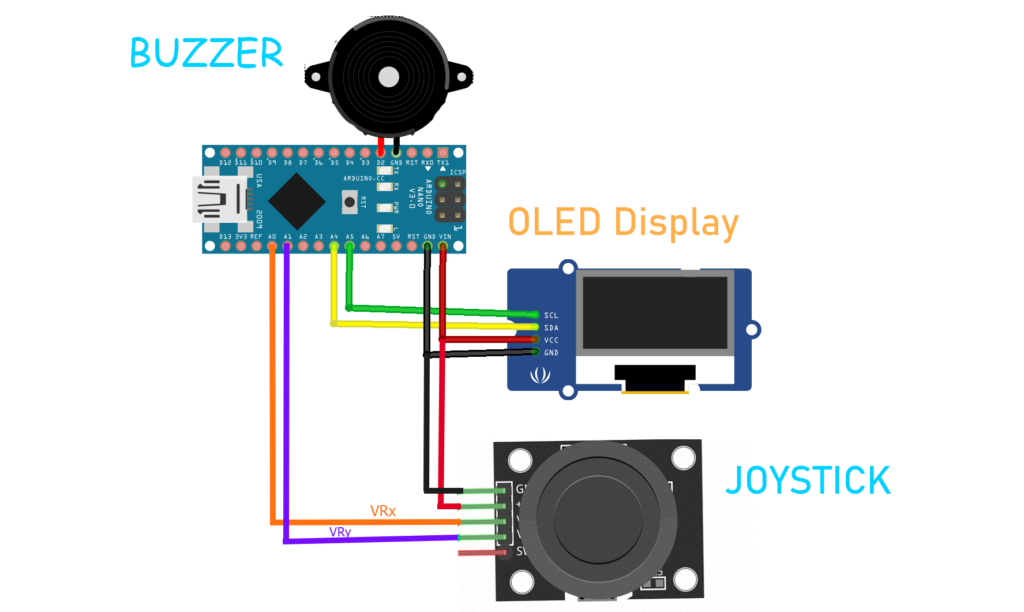
OLED Display (I2C)
| OLED Pin | Arduino |
|---|---|
| VCC | 5V |
| GND | GND |
| SDA | A4 |
| SCL | A5 |
Joystick Module
| Joystick Pin | Arduino |
|---|---|
| VCC | 5V |
| GND | GND |
| VRX | A0 |
| VRY | A1 |
| SW | D2 |
💻 Arduino Code
Below is the final code used for this project:
#include <Wire.h>
#include <Adafruit_SSD1306.h>
#include <Adafruit_GFX.h>

Adafruit_SSD1306 display(128, 64, &Wire, -1);

#define JOYSTICK_X A0
#define JOYSTICK_Y A1
#define BUZZER_PIN 2

#define SNAKE_MAX_LENGTH 12
int snake_x[SNAKE_MAX_LENGTH];
int snake_y[SNAKE_MAX_LENGTH];
int snake_length = 2;
int score = 0;
int snake_dir = 0;  // 0 = right, 1 = up, 2 = left, 3 = down
int food_x;
int food_y;

void setup() {
  display.begin(SSD1306_SWITCHCAPVCC, 0x3C);
  display.clearDisplay();
  display.display();

  pinMode(BUZZER_PIN, OUTPUT);

  //randomSeed(analogRead(0));
  food_x = random(0, display.width() / 8);
  food_y = random(0, display.height() / 8);

  snake_x[0] = 0;
  snake_y[0] = 0;
  snake_x[1] = 1;
  snake_y[1] = 0;

  drawSnake();
  drawFood();
}

void loop() {
  delay(80);

  //Joystick Control
  int xVal = analogRead(JOYSTICK_X);
  int yVal = analogRead(JOYSTICK_Y);

  if (xVal > 850 && snake_dir != 2) {  // Right
    snake_dir = 0;
  } else if (xVal < 150 && snake_dir != 0) {  // Left
    snake_dir = 2;
  } else if (yVal > 850 && snake_dir != 1) {  // Down
    snake_dir = 3;
  } else if (yVal < 150 && snake_dir != 3) {  // UP
    snake_dir = 1;
  }
  for (int i = snake_length - 1; i > 0; i--) {
    snake_x[i] = snake_x[i - 1];
    snake_y[i] = snake_y[i - 1];
  }

  switch (snake_dir) {
    case 0:
      snake_x[0]++;
      break;
    case 1:
      snake_y[0]--;
      break;
    case 2:
      snake_x[0]--;
      break;
    case 3:
      snake_y[0]++;
      break;
  }

  if (snake_x[0] < 0) {
    snake_x[0] = display.width() / 8 - 1;
  } else if (snake_x[0] >= display.width() / 8) {
    snake_x[0] = 0;
  }

  if (snake_y[0] < 0) {
    snake_y[0] = display.height() / 8 - 1;
  } else if (snake_y[0] >= display.height() / 8) {
    snake_y[0] = 0;
  }

  //Eat Apple
  if (snake_x[0] == food_x && snake_y[0] == food_y) {
    if (snake_length < SNAKE_MAX_LENGTH) {
      snake_length++;
    }
    score = score + 1;

    digitalWrite(BUZZER_PIN, HIGH);
    delay(10);
    digitalWrite(BUZZER_PIN, LOW);

    food_x = random(0, display.width() / 8);
    food_y = random(0, display.height() / 8);
  }

  for (int i = 1; i < snake_length; i++) {
    if (snake_x[0] == snake_x[i] && snake_y[0] == snake_y[i]) {
      gameOver();
      Reset();
    }
  }

  display.clearDisplay();
  drawSnake();
  drawFood();
  display.display();
}

void drawSnake() {

  for (int i = 0; i < snake_length; i++) {
    display.fillRect(snake_x[i] * 8, snake_y[i] * 8, 8, 8, WHITE);
  }
}

void drawFood() {
  display.fillRect(food_x * 8, food_y * 8, 8, 8, WHITE);
}

void gameOver() {
  display.clearDisplay();
  display.setTextSize(2);
  display.setTextColor(WHITE);
  display.setCursor(5, 20);
  display.println("Game Over!");
  display.setCursor(15, 40);
  display.print("Score: ");
  display.println(score);
  display.display();
  delay(3000);
}

void Reset() {
  score = 0;
  food_x = random(0, display.width() / 8);
  food_y = random(0, display.height() / 8);
  snake_length = 2;
  snake_dir = 0;  // 0 = right, 1 = up, 2 = left, 3 = down
  snake_x[0] = 0;
  snake_y[0] = 0;
  snake_x[1] = 1;
  snake_y[1] = 0;
}
Before uploading, make sure to install these libraries from the Arduino Library Manager:
- Adafruit SSD1306
- Adafruit GFX Library
▶️ Uploading the Code
- Connect your Arduino board to your computer.
- Open Arduino IDE.
- Install the required libraries.
- Copy and paste the code.
- Select your board and port.
- Click Upload.
Once uploaded, the game will start automatically on the OLED display.
🧠 How the Game Works
The Arduino controls a snake that moves across the OLED screen, and the joystick allows you to change the snake’s direction:
- Move up/down/left/right using the joystick
- The snake eats food pixels
- Each food item makes the snake grow longer
- The game ends if the snake hits the wall or itself
When the snake collides with itself, the Game Over screen appears and the game restarts.
🚀 Possible Improvements
You can make the game even better by adding:
- You can improve the project by adding:
- 🏆 High score storage using EEPROM
- ⚡ Speed increase with score
- 🎨 Snake head design
- 📊 Score display during gameplay
- 🎮 Menu system
🔍 Code Explanation
In this section, we will break down the Arduino code used to create the Snake game and explain what each part does.
1️⃣ Including Required Libraries
#include <Wire.h>
#include <Adafruit_SSD1306.h>
#include <Adafruit_GFX.h>
These libraries allow the Arduino to communicate with the OLED display.
- Wire – Enables I2C communication between the Arduino and the OLED display.
- Adafruit SSD1306 – Controls the OLED display module.
- Adafruit GFX Library – Provides drawing functions like text, rectangles, and graphics.
2️⃣ Creating the Display Object
Adafruit_SSD1306 display(128, 64, &Wire, -1);
This line initializes the OLED display at 128×64 pixels and instructs the program to use the I2C communication protocol.
3️⃣ Defining Pins and Constants
#define JOYSTICK_X A0
#define JOYSTICK_Y A1
#define BUZZER_PIN 2
#define SNAKE_MAX_LENGTH 12
Here we define the hardware connections:
- A0 → Joystick X-axis
- A1 → Joystick Y-axis
- Pin 2 → Buzzer
SNAKE_MAX_LENGTH limits how long the snake can grow.
4️⃣ Game Variables
int snake_x[SNAKE_MAX_LENGTH];
int snake_y[SNAKE_MAX_LENGTH];
int snake_length = 2;
int score = 0;
int snake_dir = 0;
int food_x;
int food_y;
These variables store the game state:
snake_x[]andsnake_y[]store the coordinates of each snake segment.snake_lengthdetermines how long the snake currently is.scorestores the player’s score.snake_dircontrols the direction of movement.food_xandfood_ystore the position of the food.
Direction values:
| Value | Direction |
|---|---|
| 0 | Right |
| 1 | Up |
| 2 | Left |
| 3 | Down |
⚙️ The setup() Function
void setup() { This function runs once when the Arduino starts.
display.begin(SSD1306_SWITCHCAPVCC, 0x3C);
display.clearDisplay();
display.display();
This starts the OLED display and clears the screen.
Setting the Buzzer Pin
pinMode(BUZZER_PIN, OUTPUT);
This sets the buzzer pin as an output so the Arduino can control it.
Generating the First Food Position
  food_x = random(0, display.width() / 8);
  food_y = random(0, display.height() / 8);
This randomly places the food somewhere on the screen.
The display is divided into 8×8 pixel blocks, which makes the snake move in a grid.
Initial Snake Position
snake_x[0] = 0;
snake_y[0] = 0;
snake_x[1] = 1;
snake_y[1] = 0;
The snake starts with two segments.
🔄 The loop() Function
void loop() { This function runs continuously and controls the game.
Reading the Joystick
int xVal = analogRead(JOYSTICK_X);
int yVal = analogRead(JOYSTICK_Y);
The Arduino reads the joystick’s analog values to determine movement.
Determining Snake Direction
if (xVal > 850 && snake_dir != 2)
The second condition prevents the snake from instantly turning into itself.
Moving the Snake Body
for (int i = snake_length - 1; i > 0; i--) {
    snake_x[i] = snake_x[i - 1];
    snake_y[i] = snake_y[i - 1];
}
Each segment of the snake follows the segment in front of it.
Moving the Snake Head
switch (snake_dir)
This updates the snake’s head position depending on its direction.
Example:
- Moving right → increase X
- Moving up → decrease Y
Screen Wrapping
if (snake_x[0] < 0)
If the snake moves past the edge of the screen, it reappears on the opposite side.
This creates a wrap-around effect.
🍎 Detecting Food Collision
  //Eat Apple
  if (snake_x[0] == food_x && snake_y[0] == food_y) {
    if (snake_length < SNAKE_MAX_LENGTH) {
      snake_length++;
    }
    score = score + 1;

    digitalWrite(BUZZER_PIN, HIGH);
    delay(10);
    digitalWrite(BUZZER_PIN, LOW);

    food_x = random(0, display.width() / 8);
    food_y = random(0, display.height() / 8);
  }
If the snake’s head reaches the food position:
- Snake length increases
- Score increases
- The buzzer makes a sound
- New food appears
🔊 Buzzer Sound
digitalWrite(BUZZER_PIN, HIGH);
delay(10);
digitalWrite(BUZZER_PIN, LOW);
This produces a short beep sound when food is eaten.
💀 Snake Collision Detection
  for (int i = 1; i < snake_length; i++) {
    if (snake_x[0] == snake_x[i] && snake_y[0] == snake_y[i]) {
      gameOver();
      Reset();
    }
  }
This checks whether the snake’s head touches its body.
If it does:
- The game ends
gameOver()is called- The game resets
🐍 Drawing the Snake
void drawSnake()
This function draws the snake on the OLED screen.
Each segment is drawn as an 8×8 pixel square.
display.fillRect(...)
🍎 Drawing the Food
void drawFood()
This function draws the food block on the screen.
🕹 Game Over Screen
void gameOver()
When the snake collides with itself:
- The screen shows Game Over
- The final score is displayed
- The game pauses for 3 seconds
🔄 Resetting the Game
void Reset()
This function restores the initial game state:
- Score resets to 0
- Snake length resets to 2
- Snake position resets
- New food is generated
🧾 Conclusion
Building a Snake game on Arduino is a fun and educational project that combines electronics, coding, and creativity. Using a joystick and an OLED display makes the game interactive and visually appealing.
Whether you’re a beginner or an electronics enthusiast, this project is a fantastic way to learn Arduino programming and game logic.