Create a Raspberry Pi Mosque TV (Prayer Times) with RTC 🚀
In this blog post, we will build a Prayer Times Display using a Raspberry Pi and an RTC (Real Time Clock) module So no Wi-Fi is needed.
This project ensures accurate timekeeping even without an internet connection, making it perfect for homes, mosques, and schools. It is beginner-friendly and a great practical Raspberry Pi project.
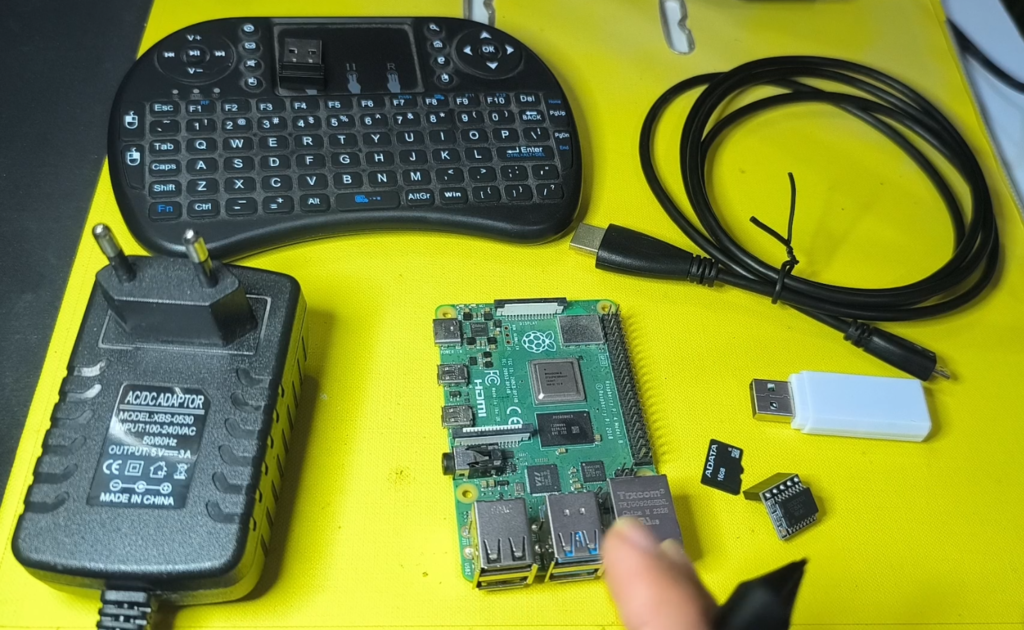
Components Required
- Raspberry Pi (3, 4, or 5)
- Boot media: microSD card (16GB+)
- Power supply
- RTC Module (DS3231 or DS1307)
- Keyboard/Mouse, and TV/Monitor
⚠️ The RTC module is not required if your Raspberry Pi will always be connected to the internet. Mawaqit automatically synchronizes time online.
✅ If you want everything in one box, here is a starter kit that will save you time, perfect for flashing the Mawaqit image and connecting your TV.
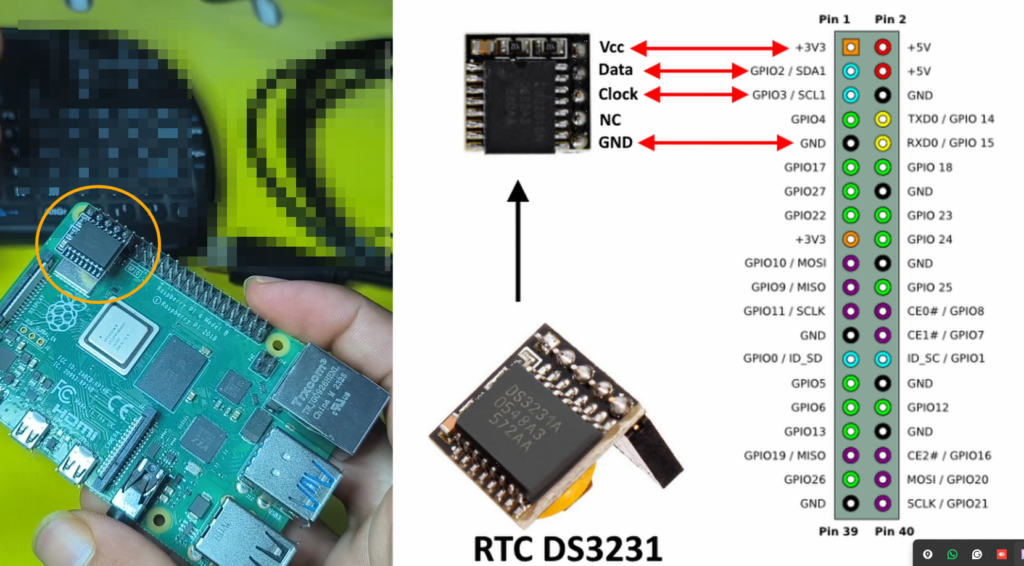
Connecting the RTC Module
If you plan to use the project offline (without internet) — for example, in a mosque without stable WiFi — then adding an RTC module is highly recommended to maintain accurate date and time even after power loss.
The RTC module communicates using the I2C protocol:
- VCC → 3.3V or 5V
- GND → GND
- SDA → GPIO2 (Pin 3)
- SCL → GPIO3 (Pin 5)
Setting Up Your Mawaqit Account
Before flashing and using the Mawaqit image on Raspberry Pi, you need to create and configure your Mawaqit account to set up prayer times and all of the settings and customizations.
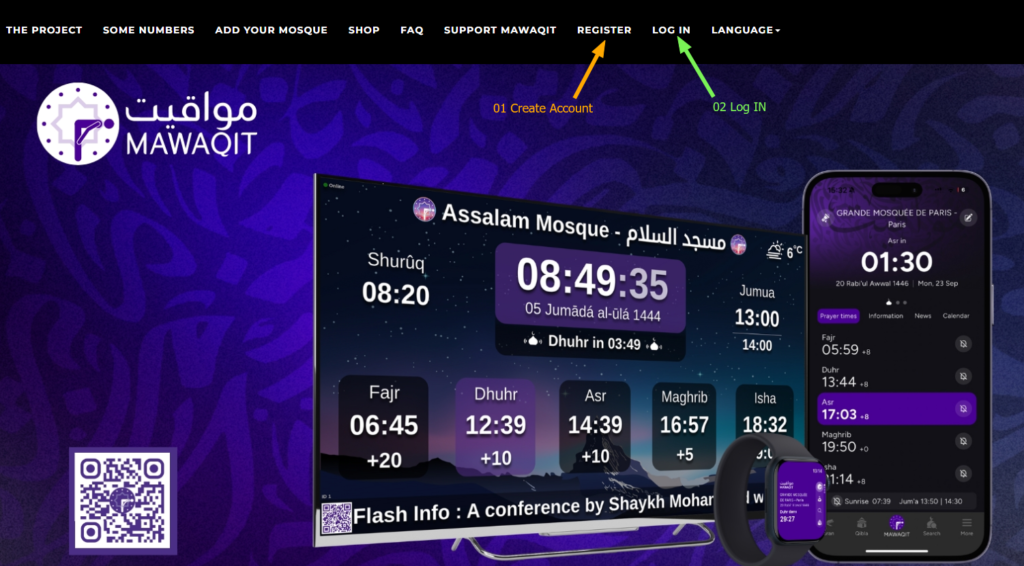
Step 1: Create a Mawaqit Account
- Go to the official Mawaqit website
- Create a new account using an Email & Password
- Verify your email address. Then Log in
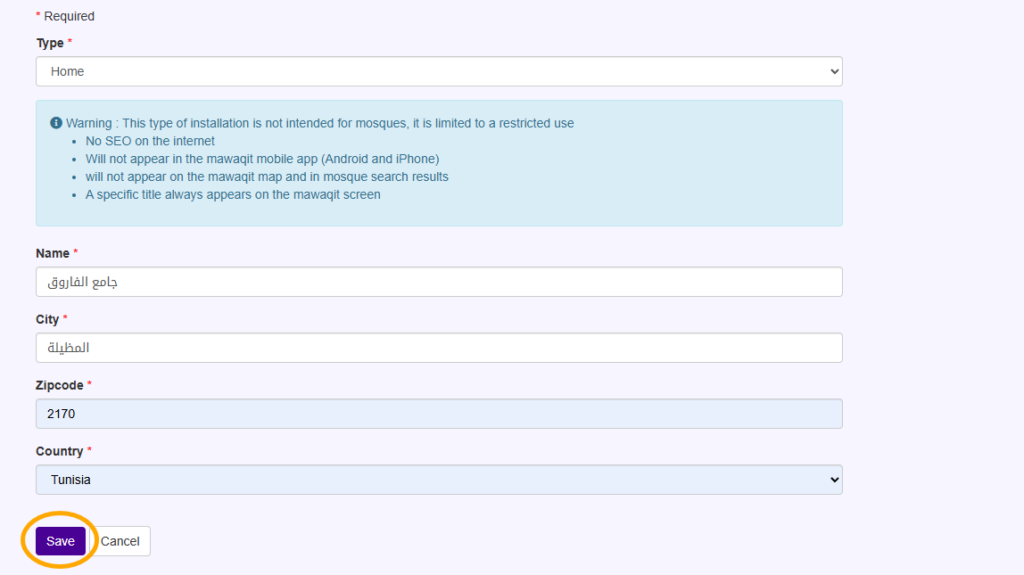
Step 2: Configure Mosque Information
Inside your dashboard (Admin):
- Press the “Add” Button
- Select the Type such as “Home”
- Put a Name, Country, and City
- And Click “Save”
Step 3: Select Prayer Time Calculation Method
The easiest way to configure prayer times is to copy the schedule from another mosque that already exists on Mawaqit.
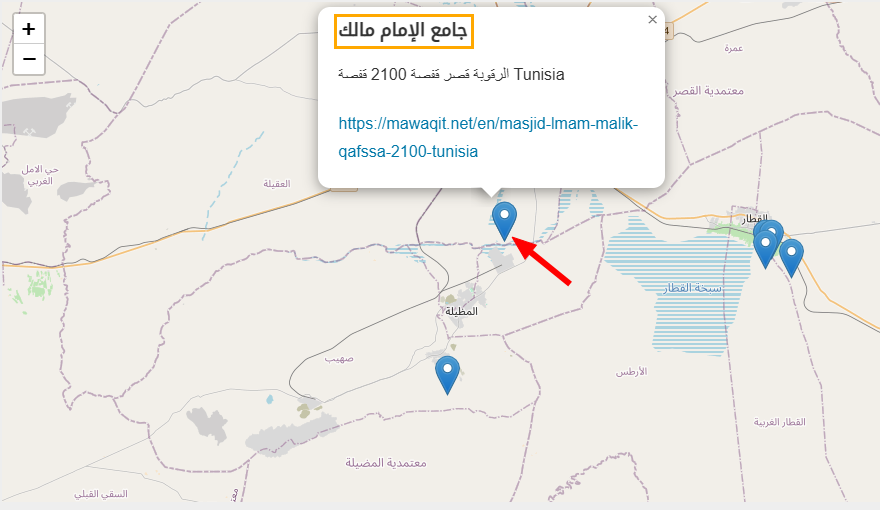
If there is a mosque in your city already using Mawaqit:
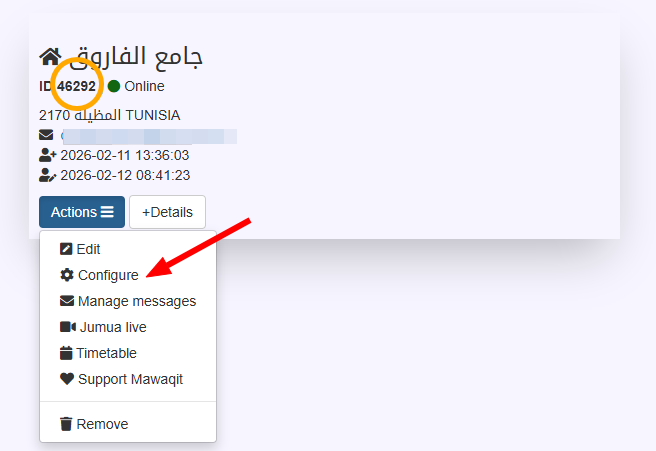
- Search for that mosque inside the platform and copy its address
- Next, go to Actions > Configure > Calculation of prayer times
- And paste its name under “Copy the schedule from another mosque.”
- Once you select it, a timetable with all prayer times is gonna be added to your mosque
This ensures your prayer times stay consistent with your local community and saves you time configuring advanced calculation parameters manually.
If no nearby mosque is available, you can manually adjust Prayer times from the Timetable:
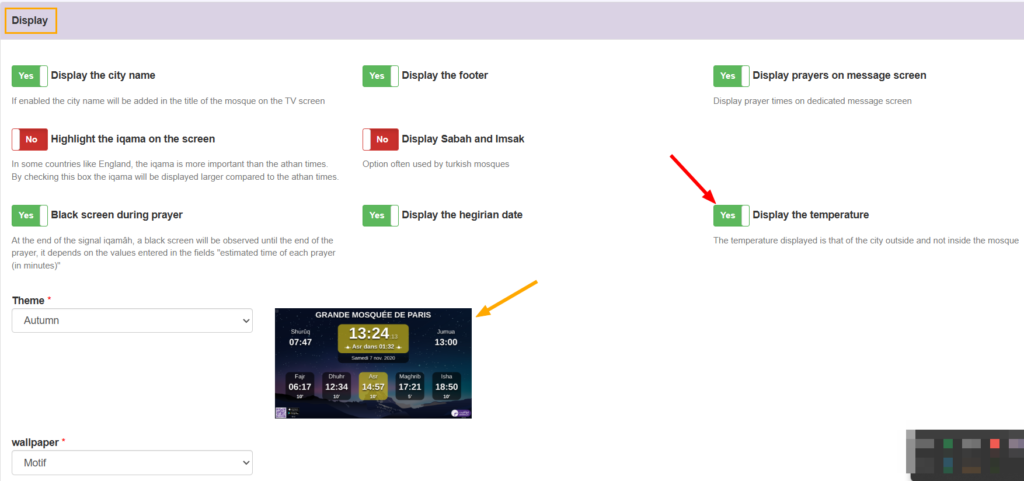
Step 4: Adjust Other Settings
The default Settings are fine, but you could configure display preferences such as:
- Display Temperature
- 12h or 24h format
- Theme and layout
- Countdown to next prayer
- Jumu’ah settings
Once you are done with all of the preferences, select “Save”, and Mawaqit will generate a unique Device ID.
⚠️ Save this ID carefully — you will use it later to synchronize your Raspberry Pi with your Mawaqit account.
Setting Up Your Raspberry Pi Device
For this project, we are using a ready-made Raspberry Pi image called Mawaqit.
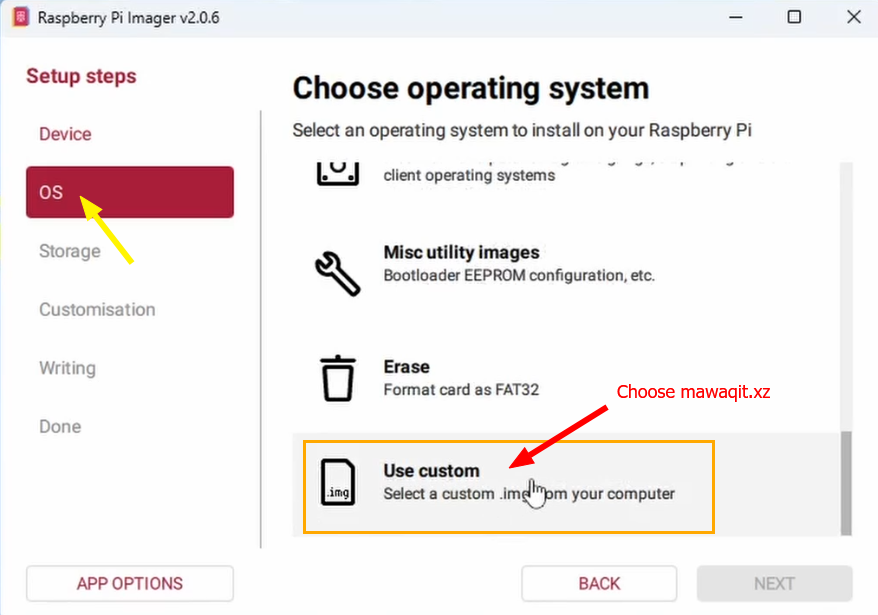
Step 1: Prepare Your Installation Media File
- Download the MAWAQIT.xz image.
- Connect your microSD card to your computer.
- Download and install the Raspberry Pi Imager for your operating system
- Flash the mawaqit.xz system image onto your microSD card using the Pi Imager.
- Wait for Writing and validation to complete.
Now, simply insert the microSD card into your Raspberry Pi as well as a mouse (Just for the first setup), connect it to a TV screen or monitor via HDMI, and finally, power it on and proceed with the next step below.
Step 2: Configure Your Raspberry Pi
- Minimize the MAWAQIT window by pressing the F11 key on your keyboard.
- Connect to the Internet (via Wi-Fi or Ethernet).
- You can also use your smartphone’s hotspot if needed.
- Internet access is only required for the initial synchronization and will not be needed afterward.
- Enable I2C By going to the Pi Logo > Interfaces > I2C > Enable
- Reboot your Raspberry PI
Step 3: Synchronizing Mawaqit
Once the Mawaqit image is flashed and running on your Raspberry Pi:
- Connect the Raspberry Pi to the internet
- Enter your Mawaqit Device ID, Email, and Password Account
- Press Validate, and your Device will be restarted
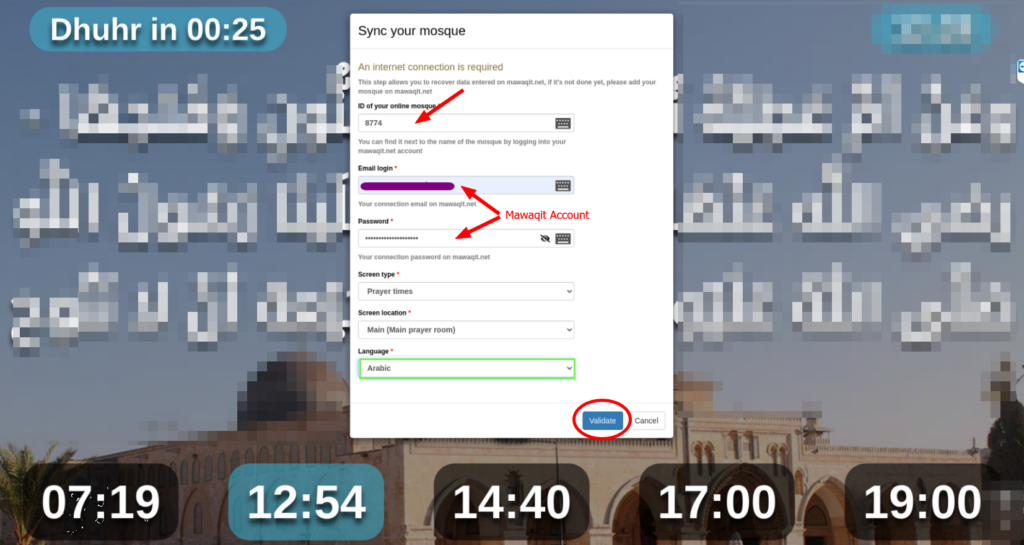
✅ Now The Raspberry Pi will automatically synchronize with your Mawaqit account and display the configured prayer times.
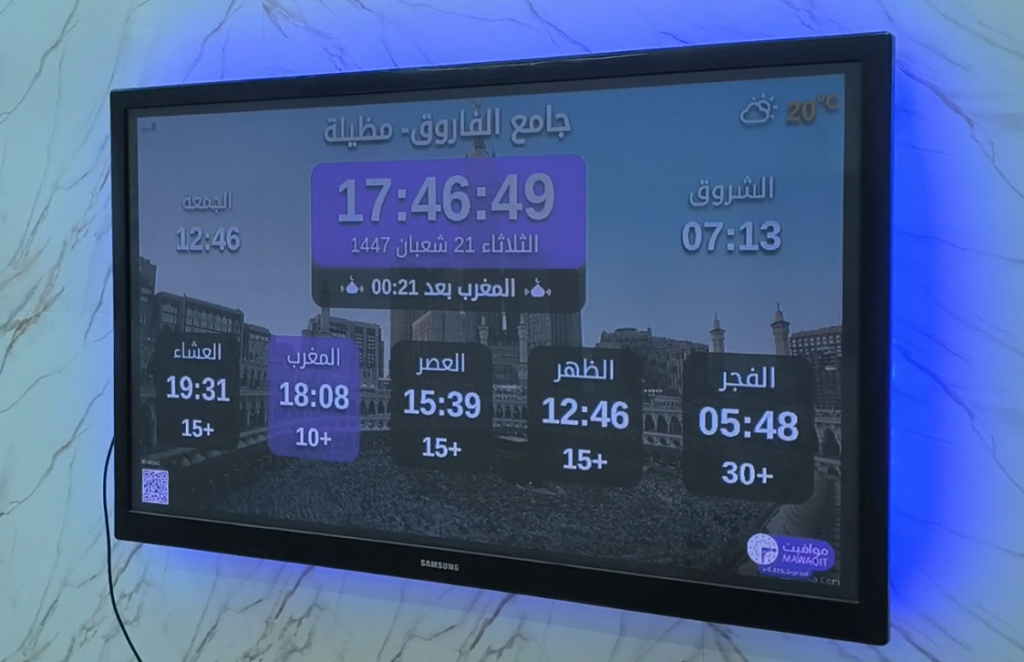
Conclusion
You have successfully learned how to create a Prayer Times Display using Raspberry Pi and RTC. This project is simple, practical, and highly customizable. Feel free to expand it based on your needs.
If you enjoyed this project, don’t forget to share it and leave feedback 🌙