Mastering VSCode with PlatformIO for (ESP32, Arduino,STM32 …)
🔥 PlatformIO, combined with Visual Studio Code (VS Code), is one of the most powerful and professional ways to program microcontrollers such as ESP32, ESP8266, Arduino, STM32, RP2040, and many others.
This step-by-step guide is written for beginners, but it also includes best practices used by professionals. By the end, you’ll be able to create, build, upload, and debug projects with confidence.
What Is PlatformIO?
PlatformIO is a powerful, open-source ecosystem for embedded development. It replaces the traditional Arduino IDE with a modern workflow that includes:
- ⚡ Faster development
- 📁 Clean and organized project structure
- 🧠 IntelliSense (auto-complete & error checking)
- 🔌 Easy switching between boards (ESP32, Arduino, STM32…)
- 🚀 Library Management & Serial Monitor
- 🐞 Built-in debugging (supported boards)
So, I’ll walk you through setting up and using PlatformIO with VS Code for various microcontrollers such as ESP32 IoT Boards.
What You’ll Need?
- ESP32 Development Board (any variant: ESP32 DevKit, NodeMCU-32S, etc.)
- LED (for testing) with a 220Ω resistor
- 16×2 LCD Display with I2C Module (for Library management testing)
- Breadboard (optional but recommended)
- Jumper Wires (male-to-female or male-to-male)
- Micro-USB Cable for programming and power
🏷️ I highly recommend getting a complete ESP32 starter kit.
It will save you time, money, and frustration—and help you learn IoT much faster.
Programming ESP32 (Guide)
Programming microcontrollers like the ESP32 with VS Code and PlatformIO is straightforward once the tools are set up. Here’s a detailed step-by-step workflow:
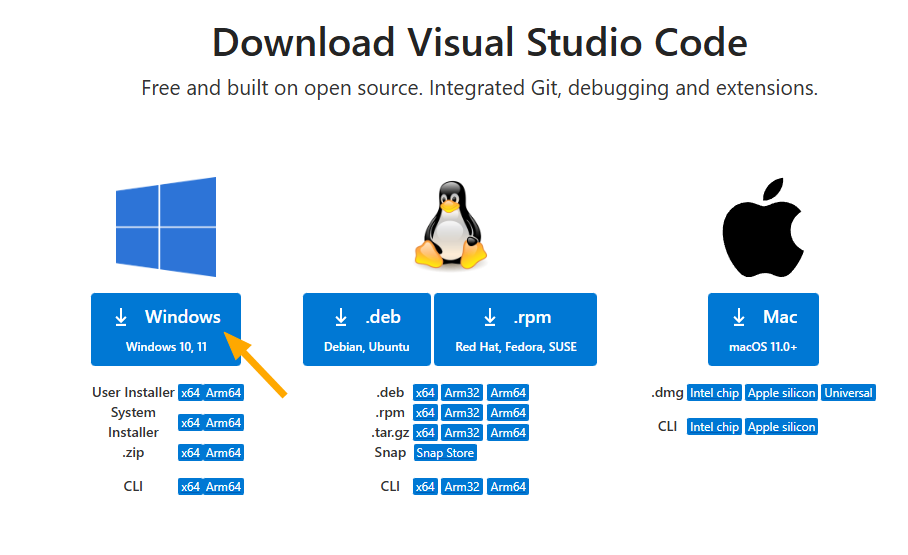
Step 1: Installing Visual Studio Code
Go to https://code.visualstudio.com/download and download the stable build for your operating system (For me, I have a Windows OS)
Install it using the default settings (Accept > Next > Next > Install)
💡 Tip: Enable the option to add VS Code to your system PATH during installation for easier command-line access.
Once installed, open VS Code.
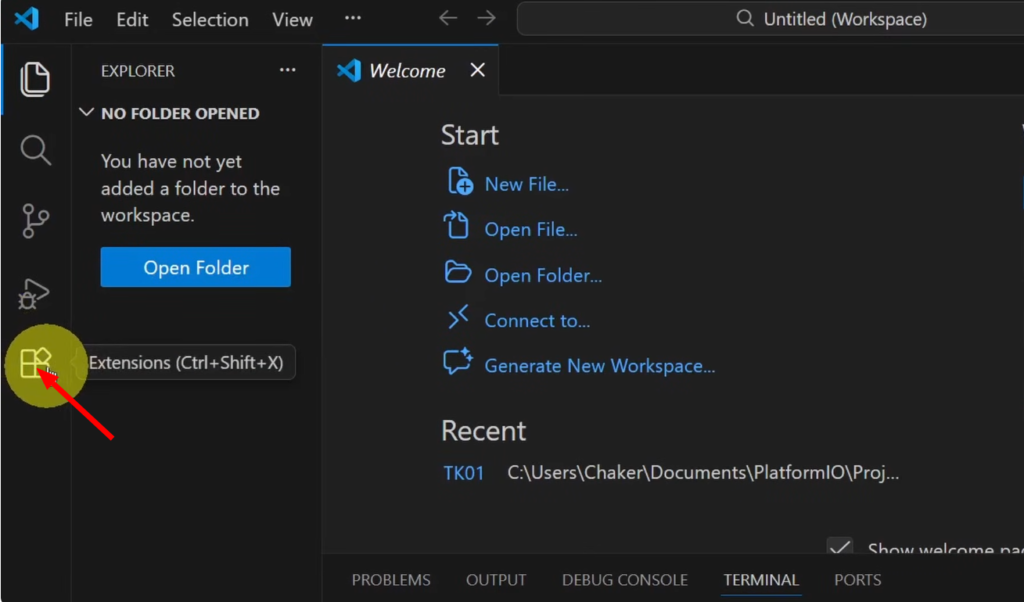
Step 2: Install PlatformIO Extension
- First Open VS Code
- Go to Extensions (Ctrl+Shift+X / Cmd+Shift+X)
- Search for “PlatformIO IDE”
- Finally Click Install
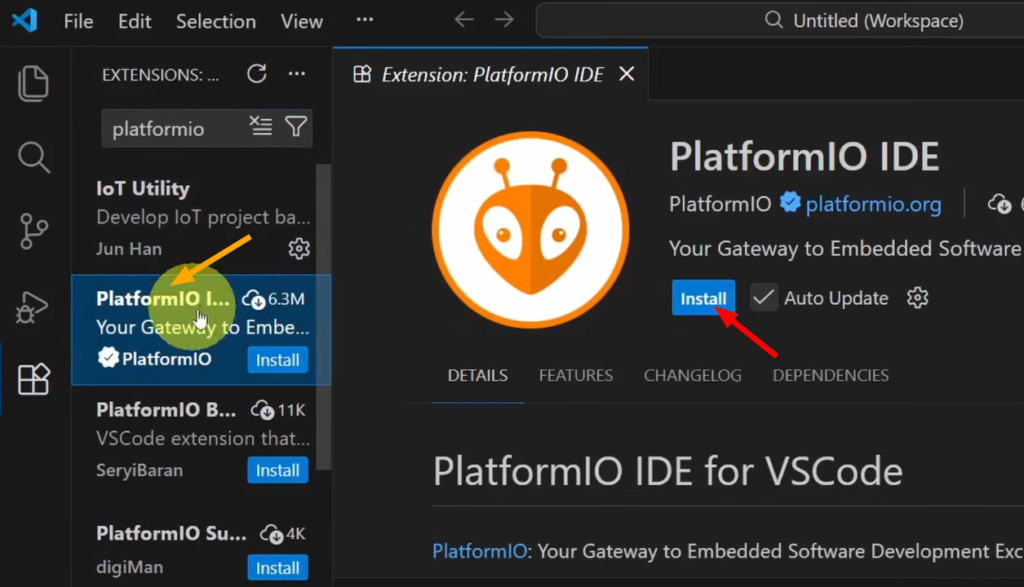
⏳ The installation may take a few minutes because PlatformIO installs tools and frameworks in the background.
After installation, VS Code may restart automatically. Restart it when prompted
Step 3: Install USB Drivers and Check COM Port (Important)
Before creating any PlatformIO project, your computer must correctly recognize the microcontroller. This step is critical for Windows! The ESP32 needs specific drivers to communicate with your computer:
Install USB-to-Serial Drivers
If drivers are missing, the board will not appear on your computer.
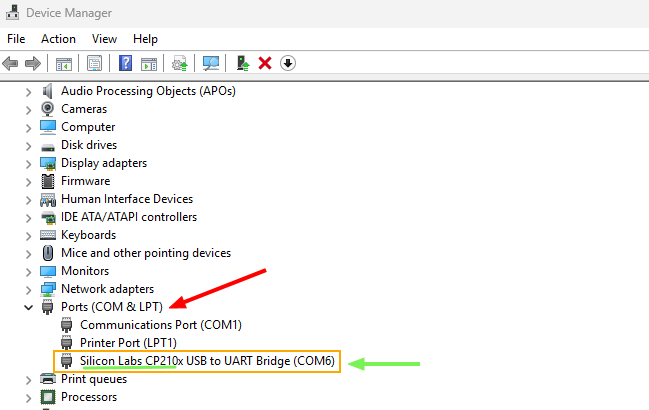
- Check your ESP32’s USB chip (usually CP2102 or CH340): You could go to “Device Manager” from your computer and check for the driver name
- Download drivers:
- CP210x: Silabs Driver
- CH340: WCH Driver
- Install it, then restart your computer
Troubleshooting:
- If the COM port doesn’t appear, try a different USB cable (some are power-only)
- In Device Manager, look for “Other devices” with yellow exclamation marks
- Mac/Linux users: Usually works without drivers
💡 ESP32 boards usually require CP210x drivers.
This COM port will be used automatically by PlatformIO in most cases.
Step 4: Creating Your First Project

- Now, click on the PlatformIO icon in the left sidebar (alien icon👽)
- Select “PIO Home” → “Projects” → “Create New Project.”
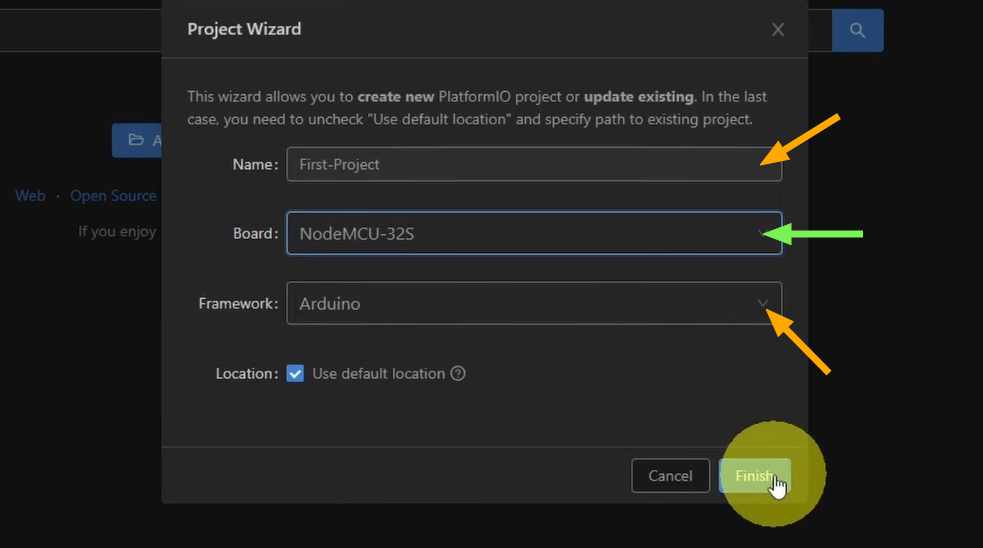
- Configure your project:
- Name: Enter project name (e.g: First-Project)
- Board: Search and select your board (e.g: “ESP32 Dev Module”)
- Framework: Select framework (Arduino)
- Location: Choose project directory or Use default location
- Click “Finish“
Understand Project Structure:
PlatformIO will now create a complete project structure:
First-Project/
├── include/ # Header files
├── lib/ # Library files
├── src/ # Source files
│ └── main.cpp # Main program file
├── test/ # Test files
├── platformio.ini # Project configuration File
The most important files: src/main.cpp & platformio.ini
Configuration (platformio.ini):
This is the configuration file for your project. Here’s a basic example for ESP32:
[env:esp32dev]
platform = espressif32
board = esp32dev
framework = arduino
monitor_speed = 115200
- platform: Hardware platform (espressif32, atmelsam, ststm32)
- board: Specific board model
- framework: Development framework
- monitor_speed: Serial monitor baud rate
- lib_deps: External libraries
Step 5: Write Your First Code (Blink Example)
Now let’s open src/main.cpp and replace the code with our Blink sketch example:
#include <Arduino.h>

// Define LED pin
const int ledPin = 2;  // Built-in LED for most ESP32 boards

void setup() {
  // Initialize serial communication
  Serial.begin(115200);

  // Initialize LED pin as output
  pinMode(ledPin, OUTPUT);

  Serial.println("ESP32 Blink Example Started!");
}

void loop() {
  // Turn LED on
  digitalWrite(ledPin, HIGH);
  Serial.println("LED ON");
  delay(1000);

  // Turn LED off
  digitalWrite(ledPin, LOW);
  Serial.println("LED OFF");
  delay(1000);
}
💡 On Arduino Uno, change pin 2 to 13.
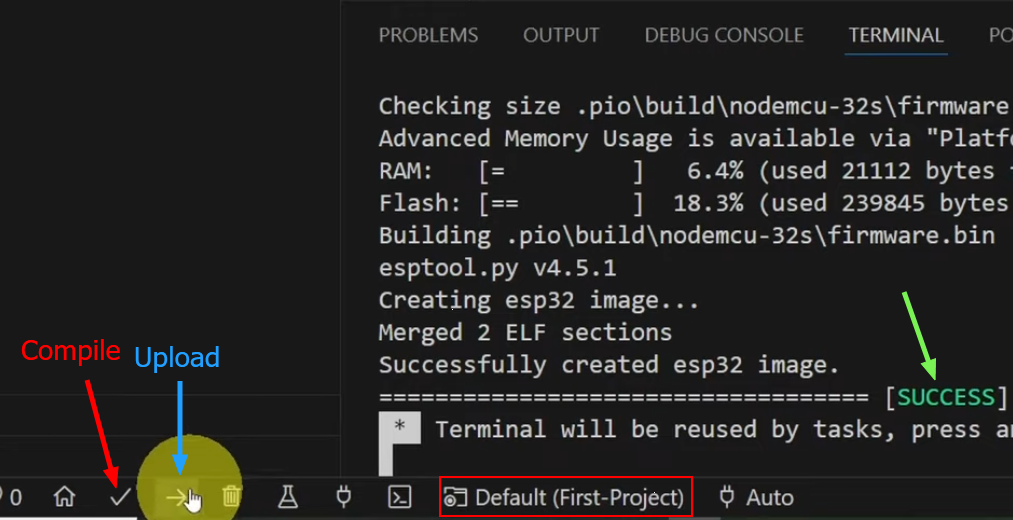
Step 6: Upload Code to the Board
First, plug in your microcontroller via USB and click the ✔ Build button at the bottom bar: This checks your code for errors before uploading.
Next Click ➡ Upload or press: Ctrl + Alt + U
Wait for the “SUCCESS” Green message
🔄 If the upload fails, press and hold the BOOT button on the ESP32 during upload.
Common Beginner Problems & Fixes
❌ Upload Failed
- Hold BOOT button while uploading
- Check correct board & port
❌ ESP32 Not Detected
- Try a different USB cable
- Install USB drivers (CP2102 / CH340)
❌ LED Not Blinking
- Wrong GPIO pin
- External LED needs a resistor
Using the Serial Monitor
To Open up the Serial Monitor:
- Click the plug icon 🔌 in the bottom bar
- Or use shortcut: Ctrl+Alt+S (Cmd+Alt+S on macOS)
- Configure baud rate in platformio.ini (monitor_speed = 115200)
Here are some Serial Monitor Features:
- Real-time serial output
- Send commands to board
- Auto-scroll
- Timestamps
- Line endings control
How to Add Libraries?
As an example we’re gonna create an LCD test project using 16×2 LCD Display with I2C Module:
Circuit Diagram (I2C LCD):
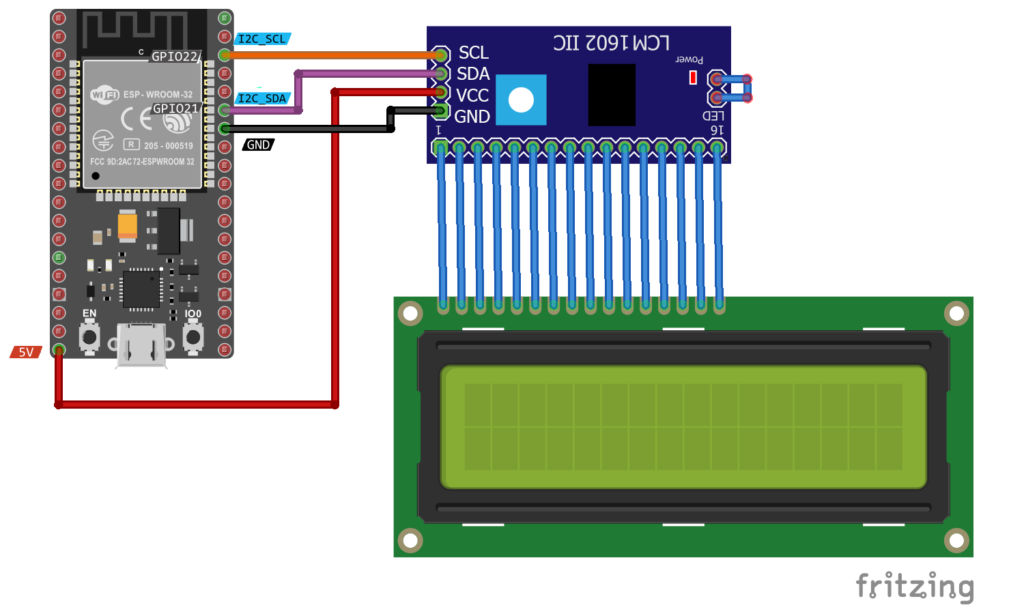
To communicate with our LCD I2C Device, we need to install an “LCD I2C” library, which handles all low-level communication with the display:
3 Methods to Add Libraries:
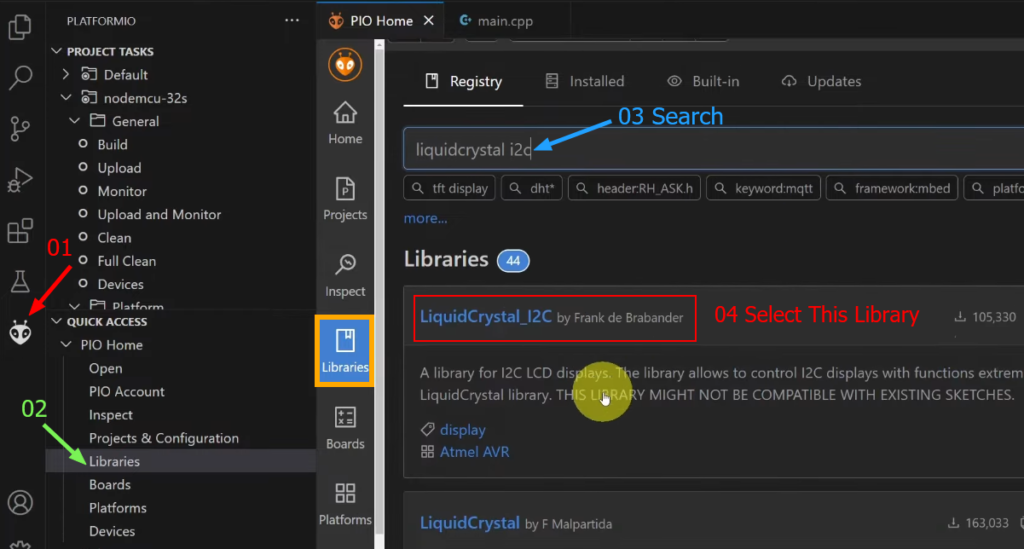
Method 1 (using Library Manager):
- Click on the PlatformIO icon → Libraries
- Search and Add the library (LiquidCrystal I2C By Frank)
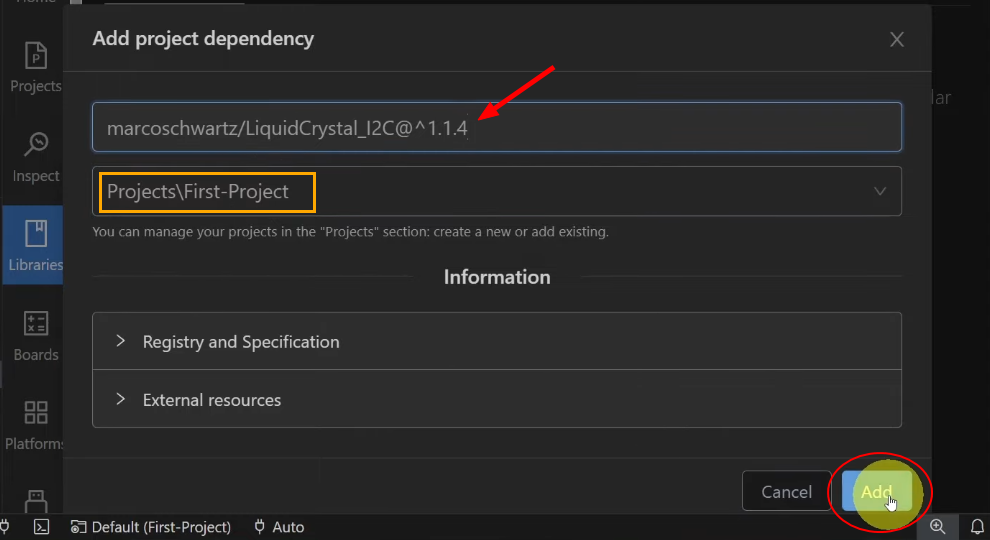
Method 2 (using platformio.ini):
Add the library using platformio.ini by writing this at the end of the file:
lib_deps = marcoschwartz/LiquidCrystal_I2C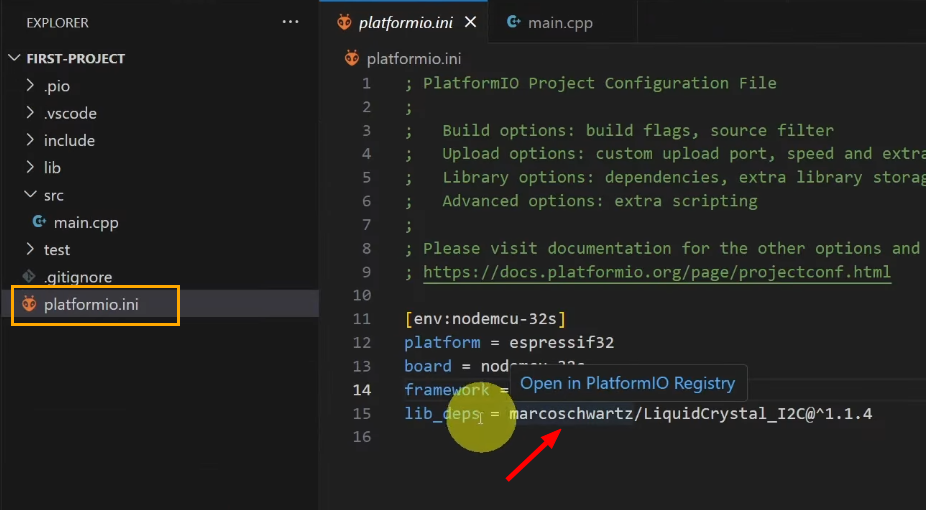
PlatformIO will automatically download and install it.
Method 3: Manual Installation:
- Download library ZIP
- Extract to
lib/folder - Restart VS Code
LCD I2C Test Code:
Replace main.cpp with the following code:
#include <Arduino.h>
#include <LiquidCrystal_I2C.h>

LiquidCrystal_I2C lcd(0x27, 16, 2); // Change address to 0X3F if needed

void setup() {
  lcd.init();
  lcd.backlight();
  lcd.setCursor(0, 0);
  lcd.print("Hello PlatformIO");
}

void loop() {

}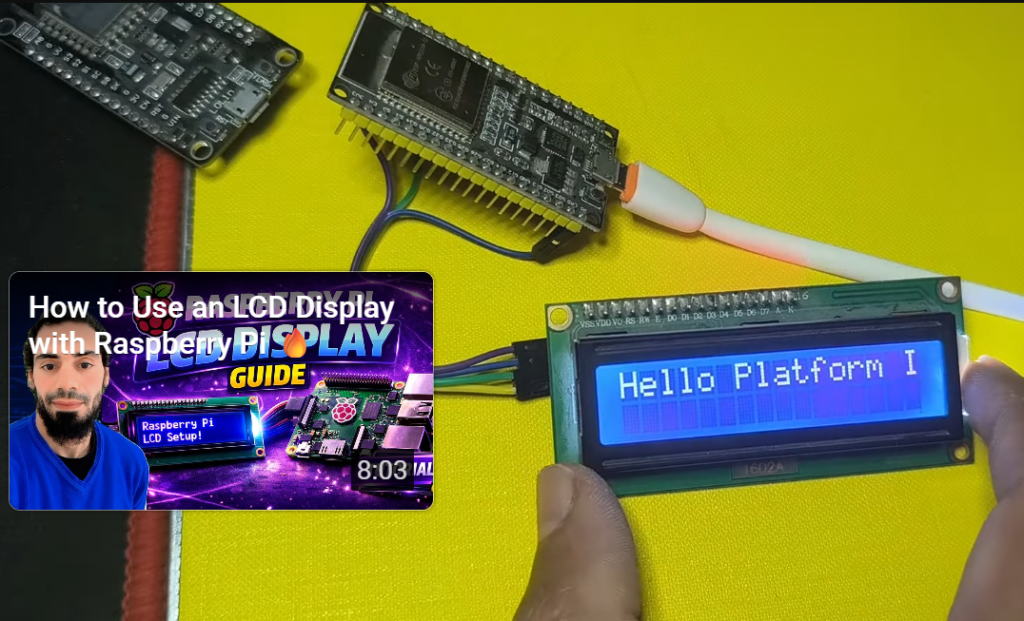
If the text appears on the LCD, the library is working correctly.
Conclusion 📝
Using VS Code with PlatformIO turns microcontroller programming into a professional experience. Whether you’re working with ESP32, Arduino, or STM32, this setup gives you speed, power, and flexibility.
If you’re serious about embedded systems, PlatformIO is absolutely worth learning.